


Sitting around our evening camp fire on Tuesday 23 September 1985, a hundred metres from Aroona Hut in the Flinders Ranges, we discussed our adventure thus far. Commencing at Cape Jervis on Anzac Day 1983, initially eleven in number, we had now walked about 1,000 kilometres along the built and proposed sections of the Heysen Trail. By the time we had reached Aroona Hut, in late May, we had been walking for a total of 50 days in five 10 day stages.
Long distance walking in rugged country is not conducive to late night chats around a campfire.
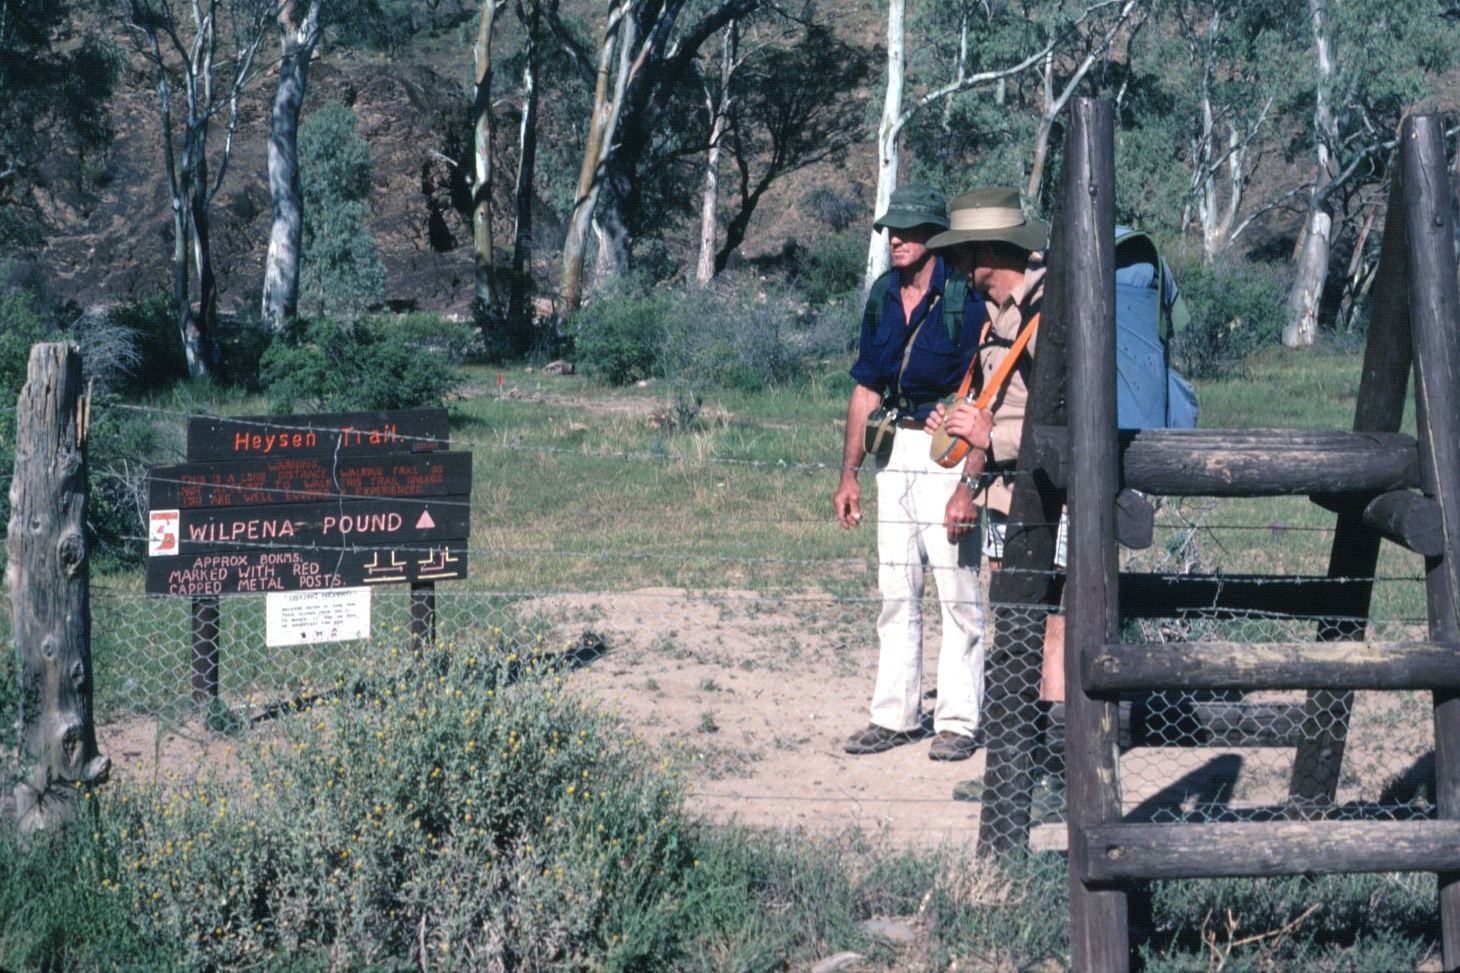
In that time our numbers had reduced to three, the bare minimum for walking safely in the Northern Flinders Ranges. Although I and my companions, Bob Nicolle and Dick Grant, had plenty of experiences to reflect upon in our journey thus far we retired early. The following morning we would commence our next ten day stage from Aroona Hut to Sliding Rock Mine. Long distance walking in rugged country is not conducive to late night chats around a campfire.
Rising early as was our custom we were soon following the Heysen Trail markers north. After just a kilometre or so we walked to the west off the Trail and deposited our packs at what would be a suitable campsite for that evening and proceeded to climb Walkandi Peak and then Mount Hayward on the Heysen Range. We reasoned from the start of the walk that it was likely we would walk the whole of the Heysen Trail just once and we would climb as many of the prominent peaks along the way as was practical. Some peaks would be climbed as they were on the route of the built sections of the Heysen Trail (Moon Hill, Mount Lofty, Mount Crawford), some were on or close to the route we were taking where the Trail was yet to be built (Smith Hill, Mount Cone, New Campbell Hill) and some were close to built sections of the Trail and difficult to resist (Wonoka Hill, Mount Aleck, Pompey Pillar, St Mary Peak). We had already climbed 40 peaks during the first five stages of the walk.
We also aimed to visit as many of the interesting and notable places we passed near. One such place was the Bookartoo ochre mine site high up on the western side of the Heysen Range, north of Walkandi Peak.
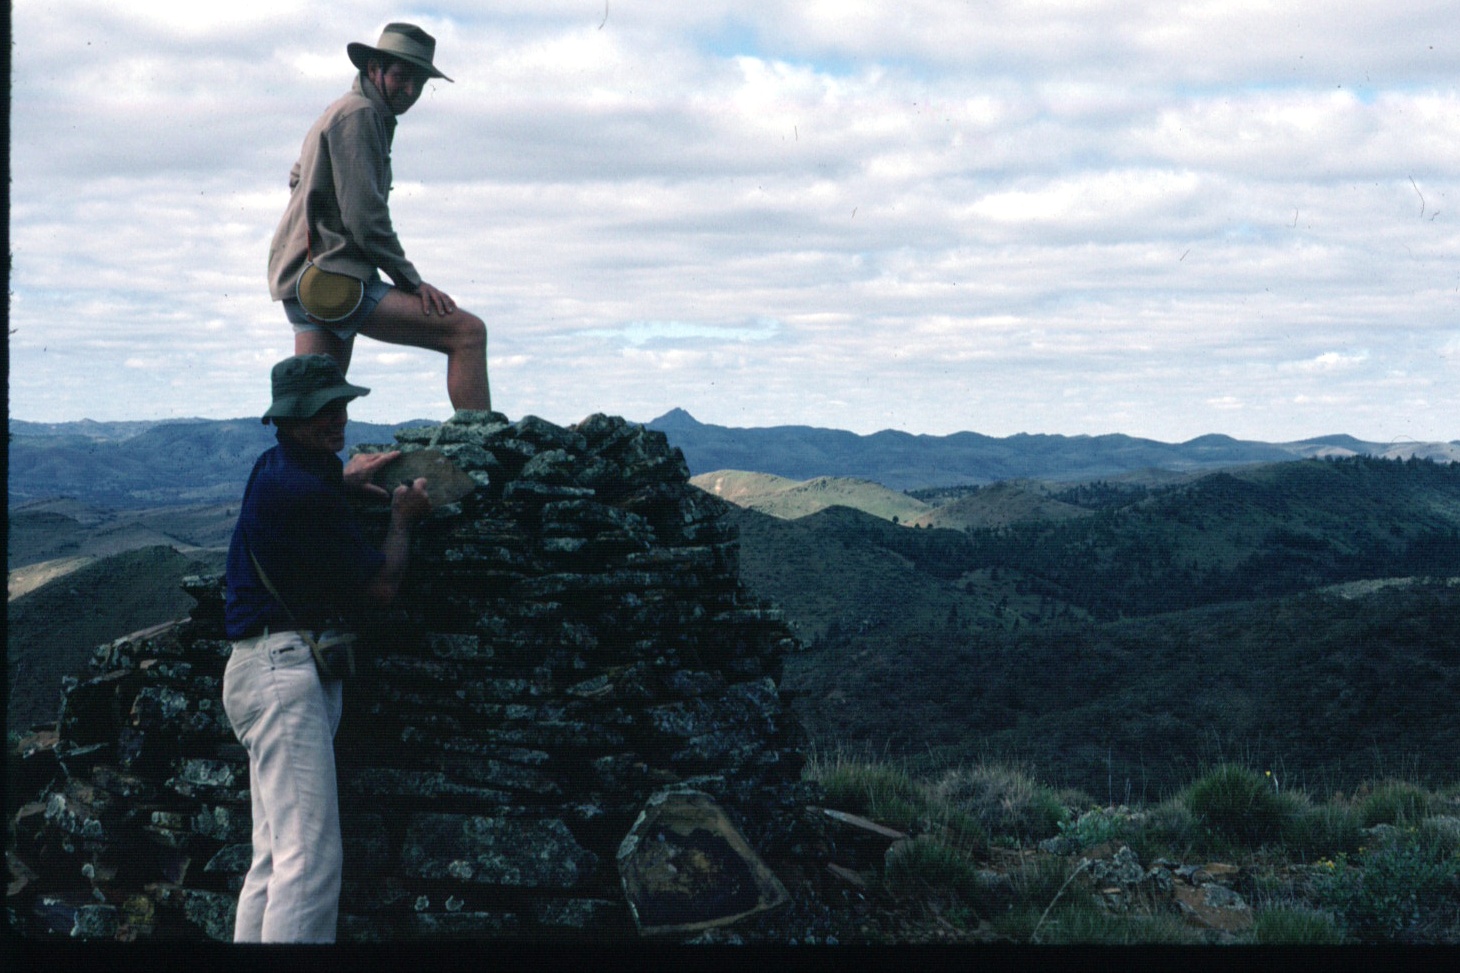
We walked west to the foothills of the Heysen Range and then south along a gradually ascending ridge that brought us to the top of the range at the summit of Walkandi Peak (~ 850 metres). After resting whilst enjoying the magnificent view to the east over Aroona Valley we walked south along the top of the range for a kilometre to the summit of Mount Hayward (865 metres).
Re-tracing our steps over and past Walkandi Peak we followed the meandering top of the range north, passing over Mount Barbara (~ 780 metres) and Mount Barloo (758 metres), before walking down a ridge to the west to the Bookartoo ochre mine.
Re-tracing our steps again we crossed over the Heysen Range at a saddle to the south of Mount Barloo and followed a ridge to the south-east into the Aroona Valley, arriving at the Heysen Trail about a kilometre north of our packs and our campsite for that night.
We arrived back at our packs in the late afternoon after an exhausting but interesting start to the current stage.
The next morning we walked the short distance back to the Trail and proceeded north, passing Pigeon Bore and crossing Taring Saddle to enter the headwaters of Five Mile Creek. Later in the morning, after Five Mile Creek flowed to the west through the Heysen Range we crossed over a further saddle and entered the headwaters of Wild Dog Creek. Arriving opposite Mount Falkland we selected our next campsite and had lunch. As we were about to finish lunch and climb to the west to the summit of Mount Falkland renowned outback tourism operator Rex Ellis appeared from the north riding a camel, leading a party of customers, also riding camels.
After a brisk climb of 380 metres we reached the top of the Heysen Range and walked north to the end of the range at Mount Falkland (792 metres). After spending some time identifying the prominent features we were to reach in the coming days we returned to our campsite in time to inspect a nearby abandoned mine site and climb a nearby peak on the ABC Range (610 metres) before erecting our tents and preparing our evening meal. So far the weather had been fine and mild but there was a good chance of quite warm weather at that time of the year.
We set of the next morning with an air of excitement, for we would soon reach the northern end of the built section of the Heysen Trail at Parachilna Gorge, and perhaps the northern end of the Heysen Trail for the foreseeable future.
Although Bob, Dick and I had not walked extensively in the Northern Flinders Ranges before we were all skilled and experienced walkers, well equipped and with a sensible level of confidence in our abilities. Our route was carefully planned in advance and we left nothing to chance. The availability of 1:50,000 topographical maps for all but the very northern tip of the Flinders Ranges made the planning of our route in advance and following the planned route in the field relatively simple – knowing where we were at all times was something we were well practised in.
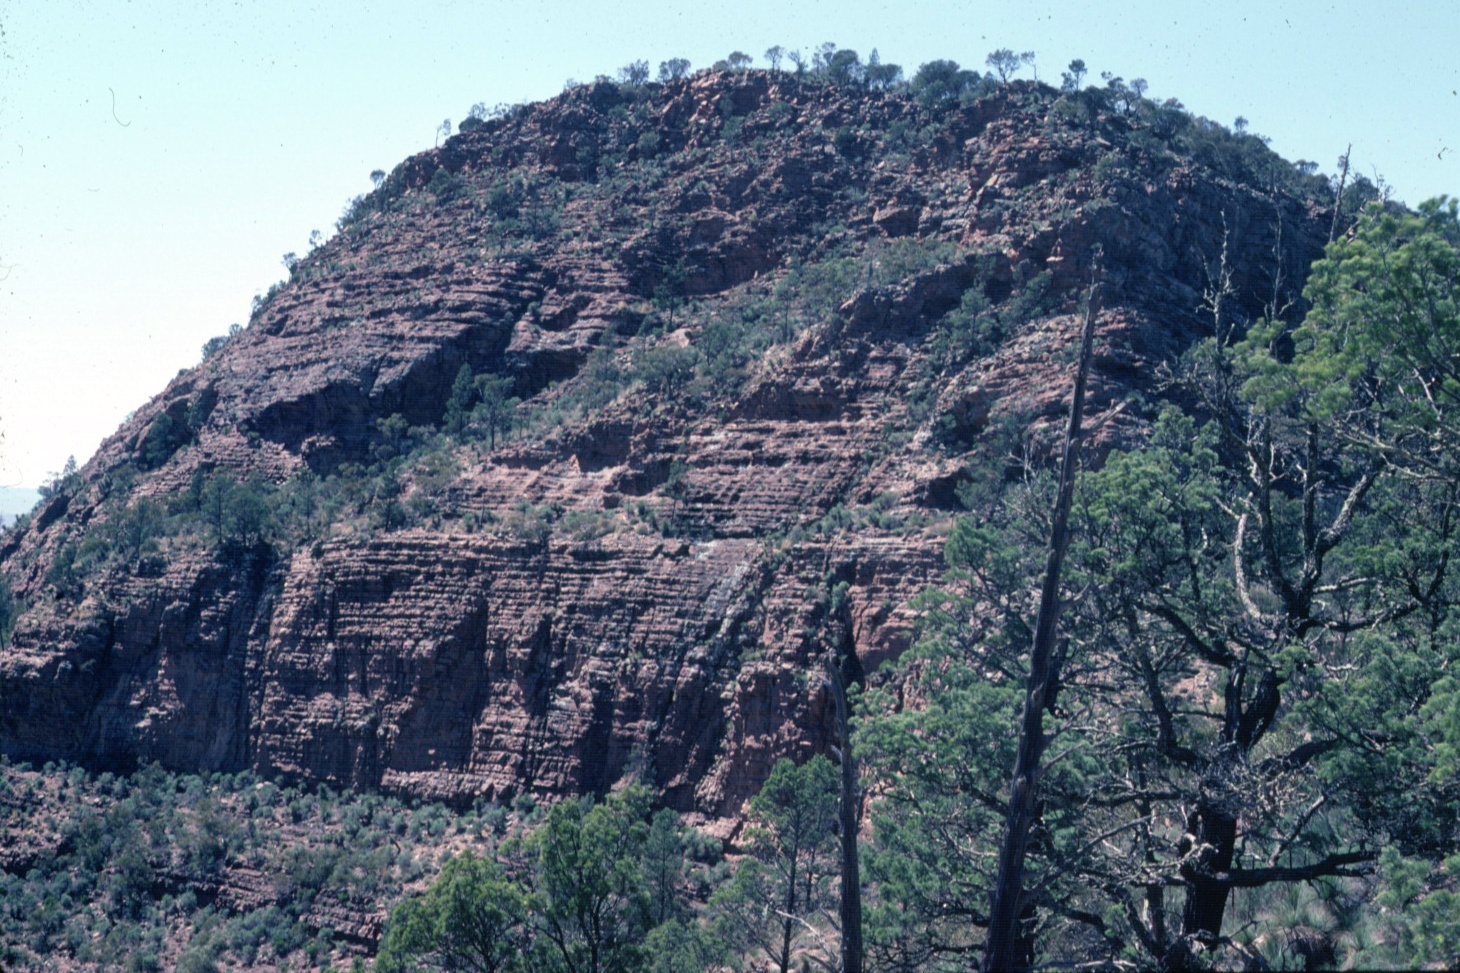
Soon after leaving our campsite the Trail passed over a saddle into the headwaters of a north flowing tributary of Parachilna Creek which we followed downstream for three kilometres to its junction with Parachilna Creek, also the northern trailhead of the Heysen Trail. After leaving the trailhead and walking downstream along Parachilna Creek, through Parachilna Gorge, for a short distance, we reached the junction of Parachilna Creek and Oratunga Creek. Turning north we commenced walking upstream along Oratunga Creek. After three kilometres of following the meandering creek bed we reached the junction of a major tributary flowing in from the north-east which we followed upstream. Several kilometres on we passed Aboriginal rock carvings on a vertical rock wall in a narrow part of the creek. After several more kilometres we decided we had reached the best point to leave the creek bed and commence the steep 225 metre climb to the summit of Mount Elkington. Selecting the best point to leave the creek bed was difficult due to heavy scrub encountered as we neared the headwaters of the creek. The ascent to the summit of Mount Elkington with still heavy food laden packs was challenging and we arrived at the summit (724 metres) in the late afternoon in an exhausted state. Our campsite that evening was on the other side of Mount Elkington at Breakneck Well. After leaving the summit after a short rest we followed a ridge north-east for two kilometres, and selected an attractive campsite near Breakneck Well in the early evening, with just enough light left in the day to erect our tents and commence the preparation of our evening meal.
The next morning we walked west through Breakneck Gorge to the Glass Gorge road which we followed to the south-east. After two hours walking we reached Blinman. An hour was spent inspecting the historic Blinman mine site, followed by showers at the Blinman Hotel. Blinman was also our mid stage food re-supply point.
After packing the food supplies and enjoying a pleasant lunch at the hotel we set out, via the Blinman War Memorial on the hill to the east of the town, for our campsite that evening at Artimore Ruins. After passing Whitford Well and crossing the Bunkers, climbing Mount Lucius (815 metres) in the process, we reached Artimore Ruins, and selected a campsite a 100 metres or so from the Ruins on the banks of Artimore Creek. We had plenty of time for a close inspection of the Ruins, with the stunning Patawarta Hill prominent just four kilometres to the north.
It was Bob’s habit to remark enthusiastically about each of our campsites, but his enthusiasm for this site, Dick and I agreed, was more than justified.
The next morning we were ready to leave a bit earlier than normal. Today was going to be a particularly interesting day as our route was to take us to Patawarta Hill. We followed a little used vehicle track north-west and after passing Pendulum Well our direction changed to the north. After crossing Home Rule Flat we entered Narina Pound through Patawarta Gap. Leaving the track we skirted to the east, around to the northern base of Patawerta Hill, selecting our next campsite just on lunch time. The weather was warm as, after lunch, we climbed the northern face of Mount Patawerta, aided by broad slabs of rock for much of the way to the summit.
The hour on the summit enabled us the opportunity to again survey the route ahead. The area we were in was relatively unknown to bushwalkers, a surprise considering its beauty. Despite the recognition of Patawarta Hill as an inspiration peak in the Flinders Ranges visitation to it and the area around it was minimal.
We returned to our campsite in good time to erect our tents and prepare our evening meal before nightfall.
The following morning we walked to the east until we reached Molkegna Bore on Magpie Creek from where we followed Magpie Creek downstream to its junction with Narina Creek. We continued north and then east along a rough track before selecting a spot for lunch. Immediately after lunch we left our packs and walked north along a series of ridges for four kilometres to the summit of Mount McFarlane (809 metres), overlooking the northern section of Narina Pound. After returning to our packs and continuing to follow the track to the east we again left our packs and climbed the nearby distinctive Ben Lomond (688 metres) in the late afternoon. This proved to be an excellent point from which we could plan our ascent of Mount Andre and the Cocks Comb the following day. After returning to our packs, in fading light, we walked north for two kilometres and selected a campsite adjacent to Midwerth Bore.
Day by day the weather was becoming increasingly warm and the weather forecasts I was able to hear on the small pocket radio I was carrying were indicating the trend would continue through to the end of the stage.
We carried our packs for only a kilometre the next morning before leaving them on the banks of Chambers Creek and starting up a steadily ascending ridge to the summit of Mount Andre. In two hours we reached the summit (~990 metres) and greeted with spectacular views to the north. The whole of the Gammon Plateau was visible, from Mount McKinley to the east and the isolated Mount Serle on the west.
Our first view of the Gammon Ranges whet our appetites for the next stage of our walk in the autumn of the following year. During the next stage our route was to cross the Gammon Ranges without descending, and include climbing Mount McKinley. Our first view of the Gammon Ranges was also an indication that our ultimate goal of Mount Babbage at the northern tip of the Flinders Ranges was becoming ever nearer.
From the summit we took the opportunity to plan our climb of Mount Hack the following day. Our next objective was to climb the Cocks Comb, just two kilometres to the west. After carefully navigating our way down the steep western face of Mount Andre and crossing a high saddle we reached the summit of the Cocks Comb (~ 960 metres). After a short break at the summit we selected another ridge to descend to our packs and enjoyed a late lunch.
Walking north-west along a track adjacent to Chambers Creek for several hours we reached our next campsite at Claypan Bore. Whilst we had anticipated the opportunity to top up our water supplies at the bore there was none to be had. Whilst we had plenty we would now be relying on the next opportunity to top up the following day at Rockwater on Sliding Rock Creek.
Again we carried our packs for only a short time the following morning, walking north for two and a half kilometres. At a planned spot in Main Gap we left our packs in a grove of trees and commenced our climb of Mount Hack, one of the highest peaks in the Northern Flinders Ranges. As forecast the temperature had continued to rise in the preceding days and was already over 30 degrees as we commenced the climb. Although we had been acclimatising to the higher temperatures since the commencement of the stage the ascent of Mount Hack was challenging. Two and half hours later we completed the 450 metre climb over several kilometres to the summit (1,086 metres). The views from the top were spectacular.
Apart from the excellent panorama north to the Gammon Plateau, Mount Hack is one of the few places in the Northern Flinders Ranges where both the plains and salt lakes on the eastern and western side of the Ranges can be seen. After returning to our packs for lunch in the early afternoon we headed north-west and then west through Warraweena Gap to Rockwater where we were able to top up our water supplies. The attractive area in the warm conditions caused us to tarry longer than had been planned. In the late afternoon, as the temperature commenced to drop we headed south.
It is fundamental of course that the Heysen Trail runs south to north or north to south along the Mount Lofty and Flinders Ranges. It was not uncommon however for our south to north walk to include routes that took us east and west, and to the south. This was to ensure we climbed as many of the significant peaks as we reasonably could as well as visiting interesting places. The southerly routes, when my companions noticed that we were walking south, generally brought good-natured derision. We followed a station track and selected a campsite three kilometres north of Old Warraweena.
The next morning we continued to walk south along the track to Yednudunga Well where we left the track and walked to the south-east towards Mount Tilley. An hour later we left our packs and scrambled up a steep ridge to the summit of Mount Tilley (1,018 metres). The temperature was warming quickly as we returned to our packs and then walked on to Old Warraweena where we carefully selected a shady spot for lunch.
Soon after lunch we reached the headwaters of Warioota Creek, which we were to follow downstream for the remainder of that day. We walked south-west for about an hour before the creek turned west, taking a tortuous route through a substantial range of hills. The gorge we now entered provided excellent walking and interest.
The heat of the afternoon sun was being concentrated by the stark bare walls of the gorge, making us thankful for the numerous pools of cool water in the bed of the creek and we stopped frequently to drink from them.
As we approached the end of the gorge in the late afternoon we left or packs and walked a short distance up a tributary entering from the east to a waterfall indicated on the map. The waterfall turned out to be a series of cascades, and we spent sufficient time enjoying them to allow time for Dick, who was feeling off-colour due to the heat, to have a dip in one of the deeper pools. Several kilometres down the Warioota Creek we selected a campsite adjacent to Dunbar Well.
We left our campsite earlier than usual the next morning to ensure we would not be late for our planned midday pick-up at the Sliding Rock Mine site. Several kilometres further down Warioota Creek we turned north and followed a bush track along the western edge of the range. Passing Mount Stuart to our east and Bob Mooney Hut we made good progress and arrived at Sliding Rock about 30 minutes before midday.
Our ten day walk had been completed without incident and we had travelled safely through an area which we hadn’t visited before. On the completion of each stage of the walk there was always a temptation to compare our experiences with those of the previous stages. We had now achieved three-quarters of the walk, and although this stage had been outstanding to me, all of the walk thus far had entirely exceeded my expectations.
We now had six months to plan our next expedition. Our sightings of the Gammon Ranges had strengthened our resolve to traverse them. It was obvious that route planning for the next stage would be absolutely crucial to its success.
Jump to content:
- Introduction – The First End-to-End walk of the Heysen Trail
- Stage One – Cape Jervis to Cudlee Creek
- Stage Two – Cudlee Creek to Burra
- Stage Three – Burra to Melrose
- Stage Four – Melrose to Kanyaka Ruins
- Stage Five – Kanyaka Ruins to Aroona Hut
- Stage Six – Aroona Hut to Sliding Rock Mine
- Stage Seven – Sliding Rock Mine to Arkaroola
- Stage Eight – Arkaroola to Mount Babbage