Norwegian technique, akin to cross country skiing is well covered on YouTube. It is useful for walking fast on flat smooth tracks and I often use it on the Heysen Trail if I wish to cover ground quickly. Your poles are pushing behind you to propel yourself forward. It is an energy intensive process and overkill for most group walks. On the generally rougher, more challenging Heysen Trail the biggest advantage poles offer is stability, increasing safety and saving energy.
As mentioned in Part 1, this exposition is very much a personal opinion, based on my experience, over twenty years, in all sorts of terrain.
Height of poles: When your poles are planted your elbows should be bent at 90 degrees. Obviously, the height of the pole will vary depending on the slope ie longer downhill, shorter up. In practice most people do not continually adjust for the terrain but start with a slightly longer pole to accommodate the more difficult / treacherous situation of downhills. However, if on a steep or slippery down, I always lengthen my poles. The longer the better. On steep ups you can use shortened poles like an ice axe to dig in and pull yourself. This is very useful in mud or scree, but requires upper body strength.
Gripping the poles in the most efficient manner is very important to avoid hand fatigue and help with the best walk rhythm. Slip your hand into the loop from below, reaching for the sky, then grab the straps and the poles together. The loop should be long enough for the strap to fall across the back of your hand lightly. If you can feel pressure the loop is too tight. If the loop is flopping around, it is too long. The pole and the straps should fit comfortably in the webbing between thumb and first finger. Be aware that this webbing can be quite soft and a potential blister area when you begin using poles in this manner, easily overcome by wearing sun gloves. The advantage of this grip is the control it offers over the pole. You do not have to clasp the handle tightly, indeed, only first finger and thumb is sufficient. No need for hand fatigue at the end of long day. Going downhill, the weight is taken by the back of the wrist, controlling the pole easily.
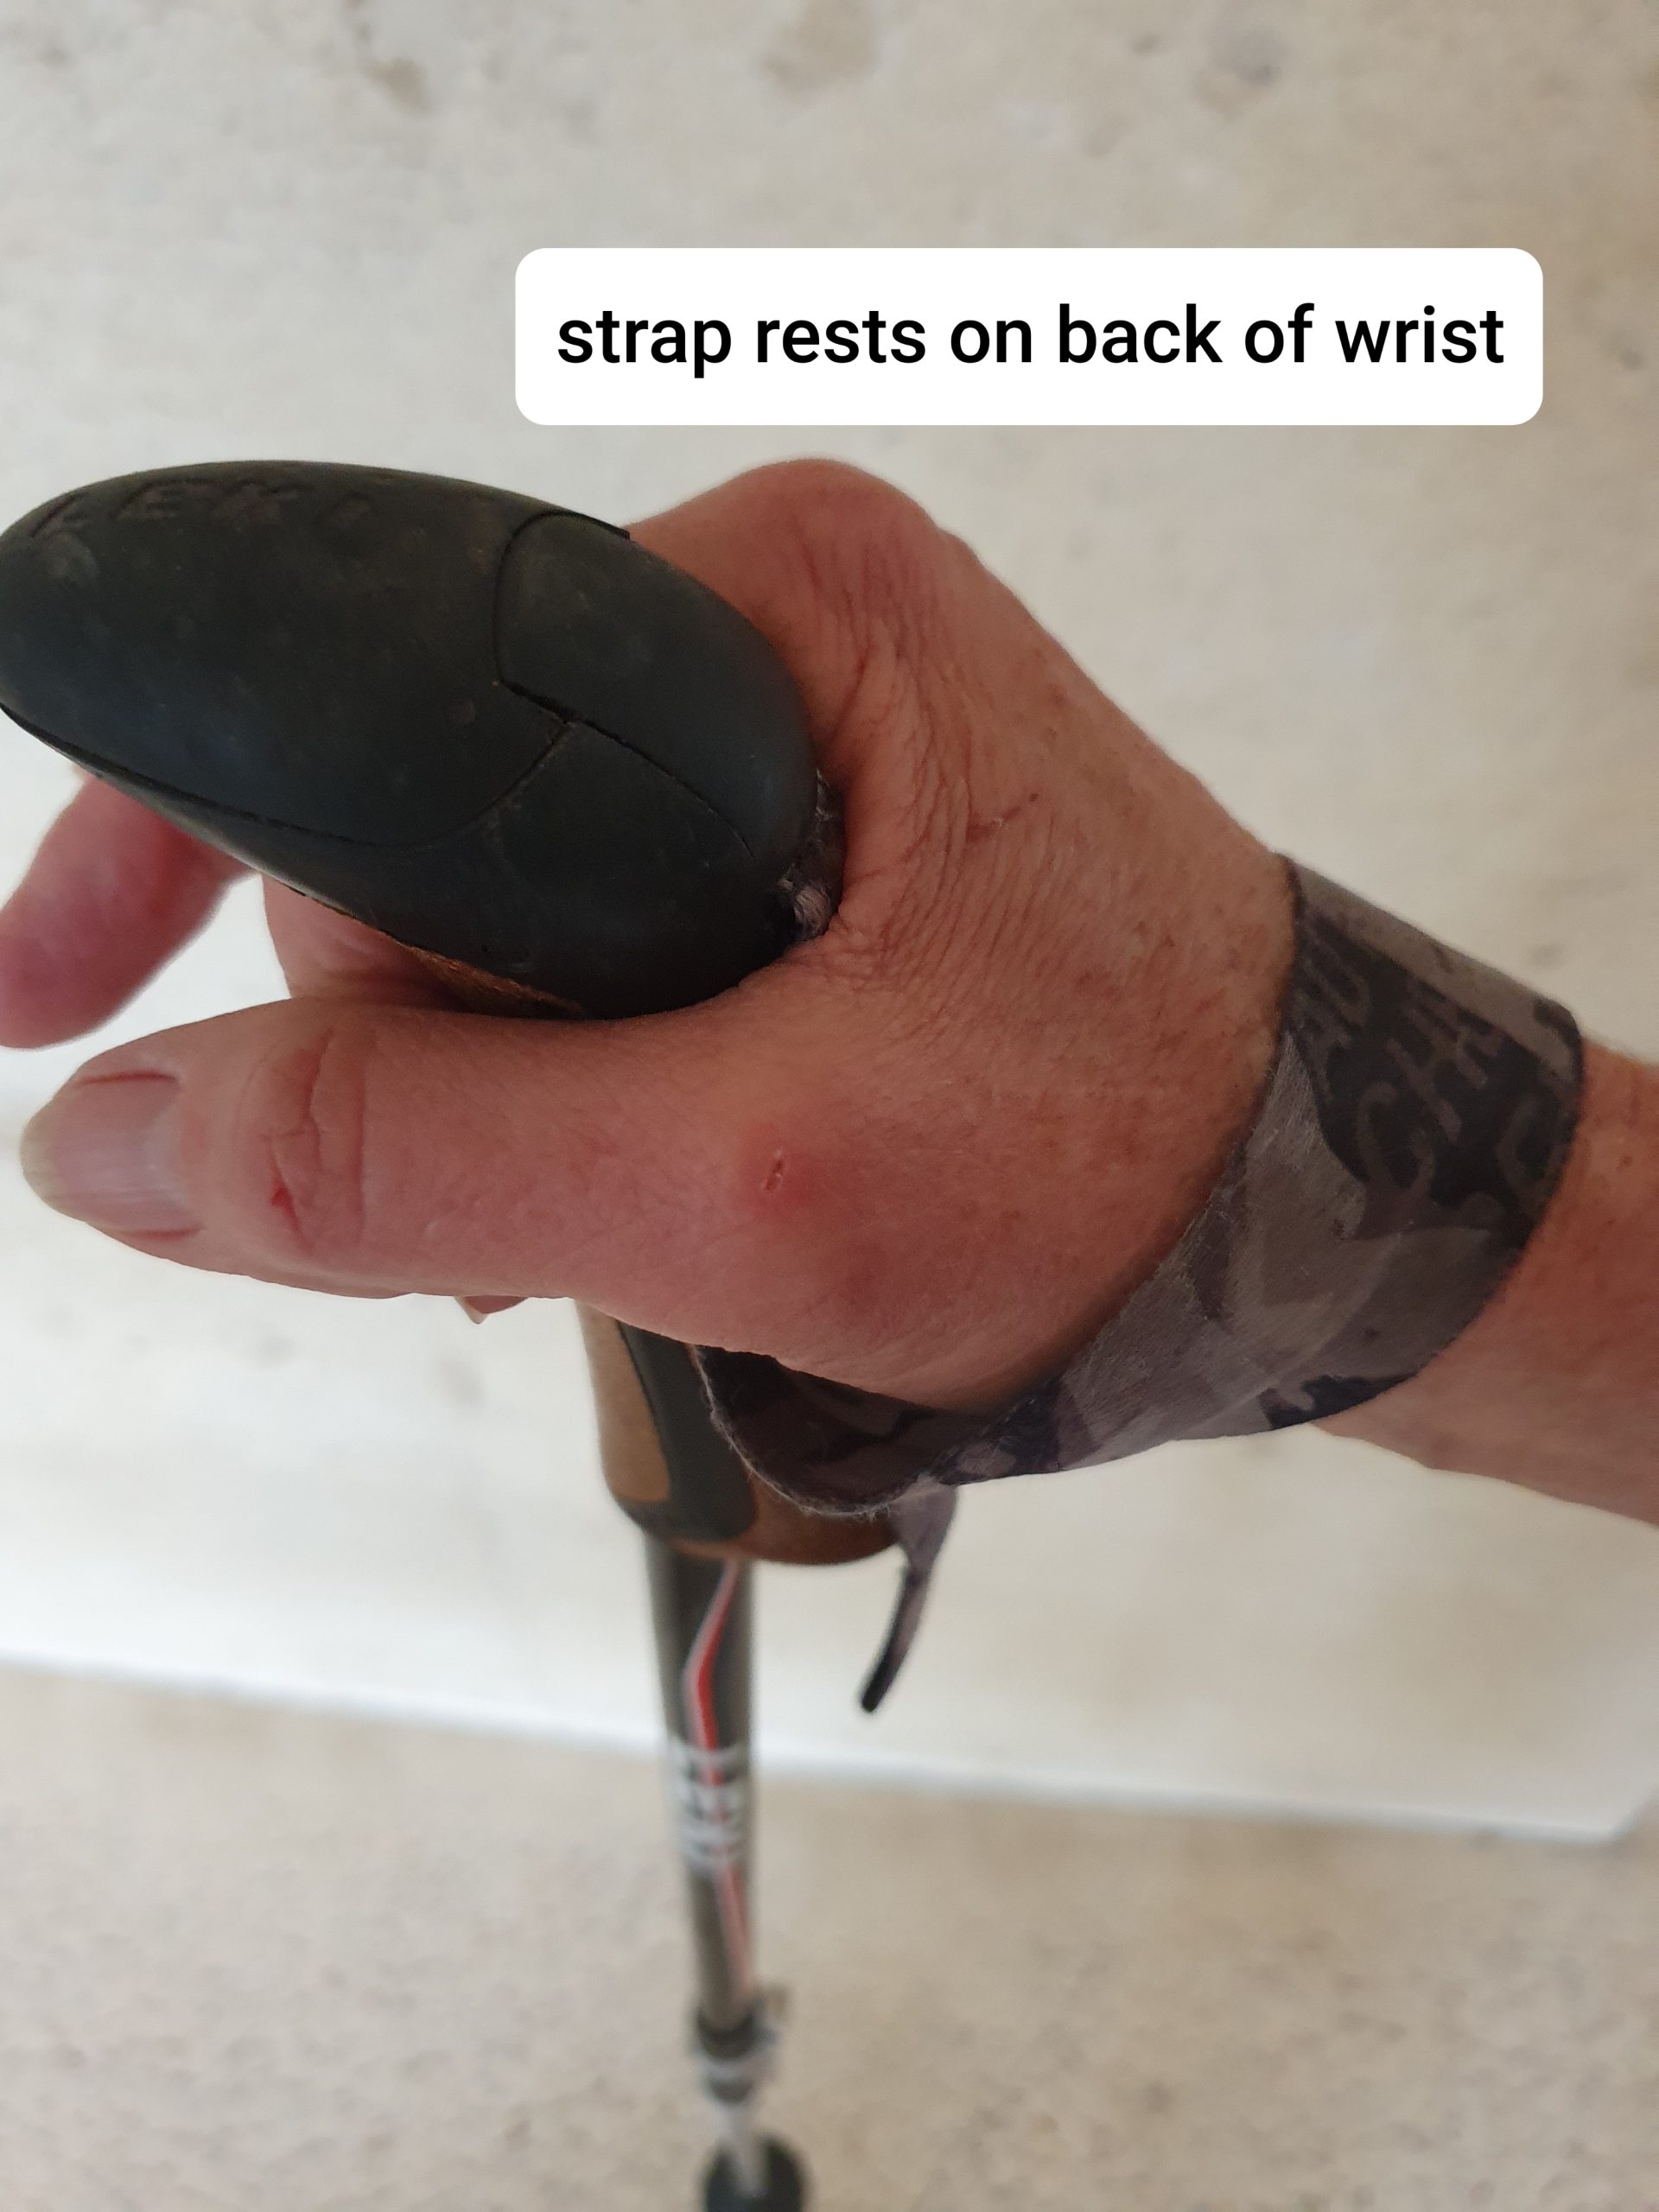

However, the biggest advantage of this grip is the ability to move the pole forward with a small flick of the wrist. No need to laboriously pick up and place your poles when you are moving on the flat. Your elbows will hardly move when you are using the poles for stability rather than propulsion. This saves energy over the course of a long walk.
The flick is also quicker than lifting and placing your poles. This becomes very important if you are on a steep down where it makes for a smooth efficient descent, but like anything it takes practice. Eventually you won’t have to think about it, and on flat tracks it increases the time spent enjoying the scenery rather than looking at your feet.
Having mastered the grip and flick you are ready for two challenges:
Stability Technique:
Used for rough terrain e.g. broken ground, creek beds, and when gazing to the horizon or navigating.
Just as the name implies your poles remain in front or level with your feet. The left pole moves forward with the right foot and vice versa. The flick makes this effortless.
If your footing is insecure, the pole in your opposite hand becomes your stabiliser. Once your ankles are conditioned and strong you can move just as quickly on broken ground as flat, which is a huge advantage in bushwalking.
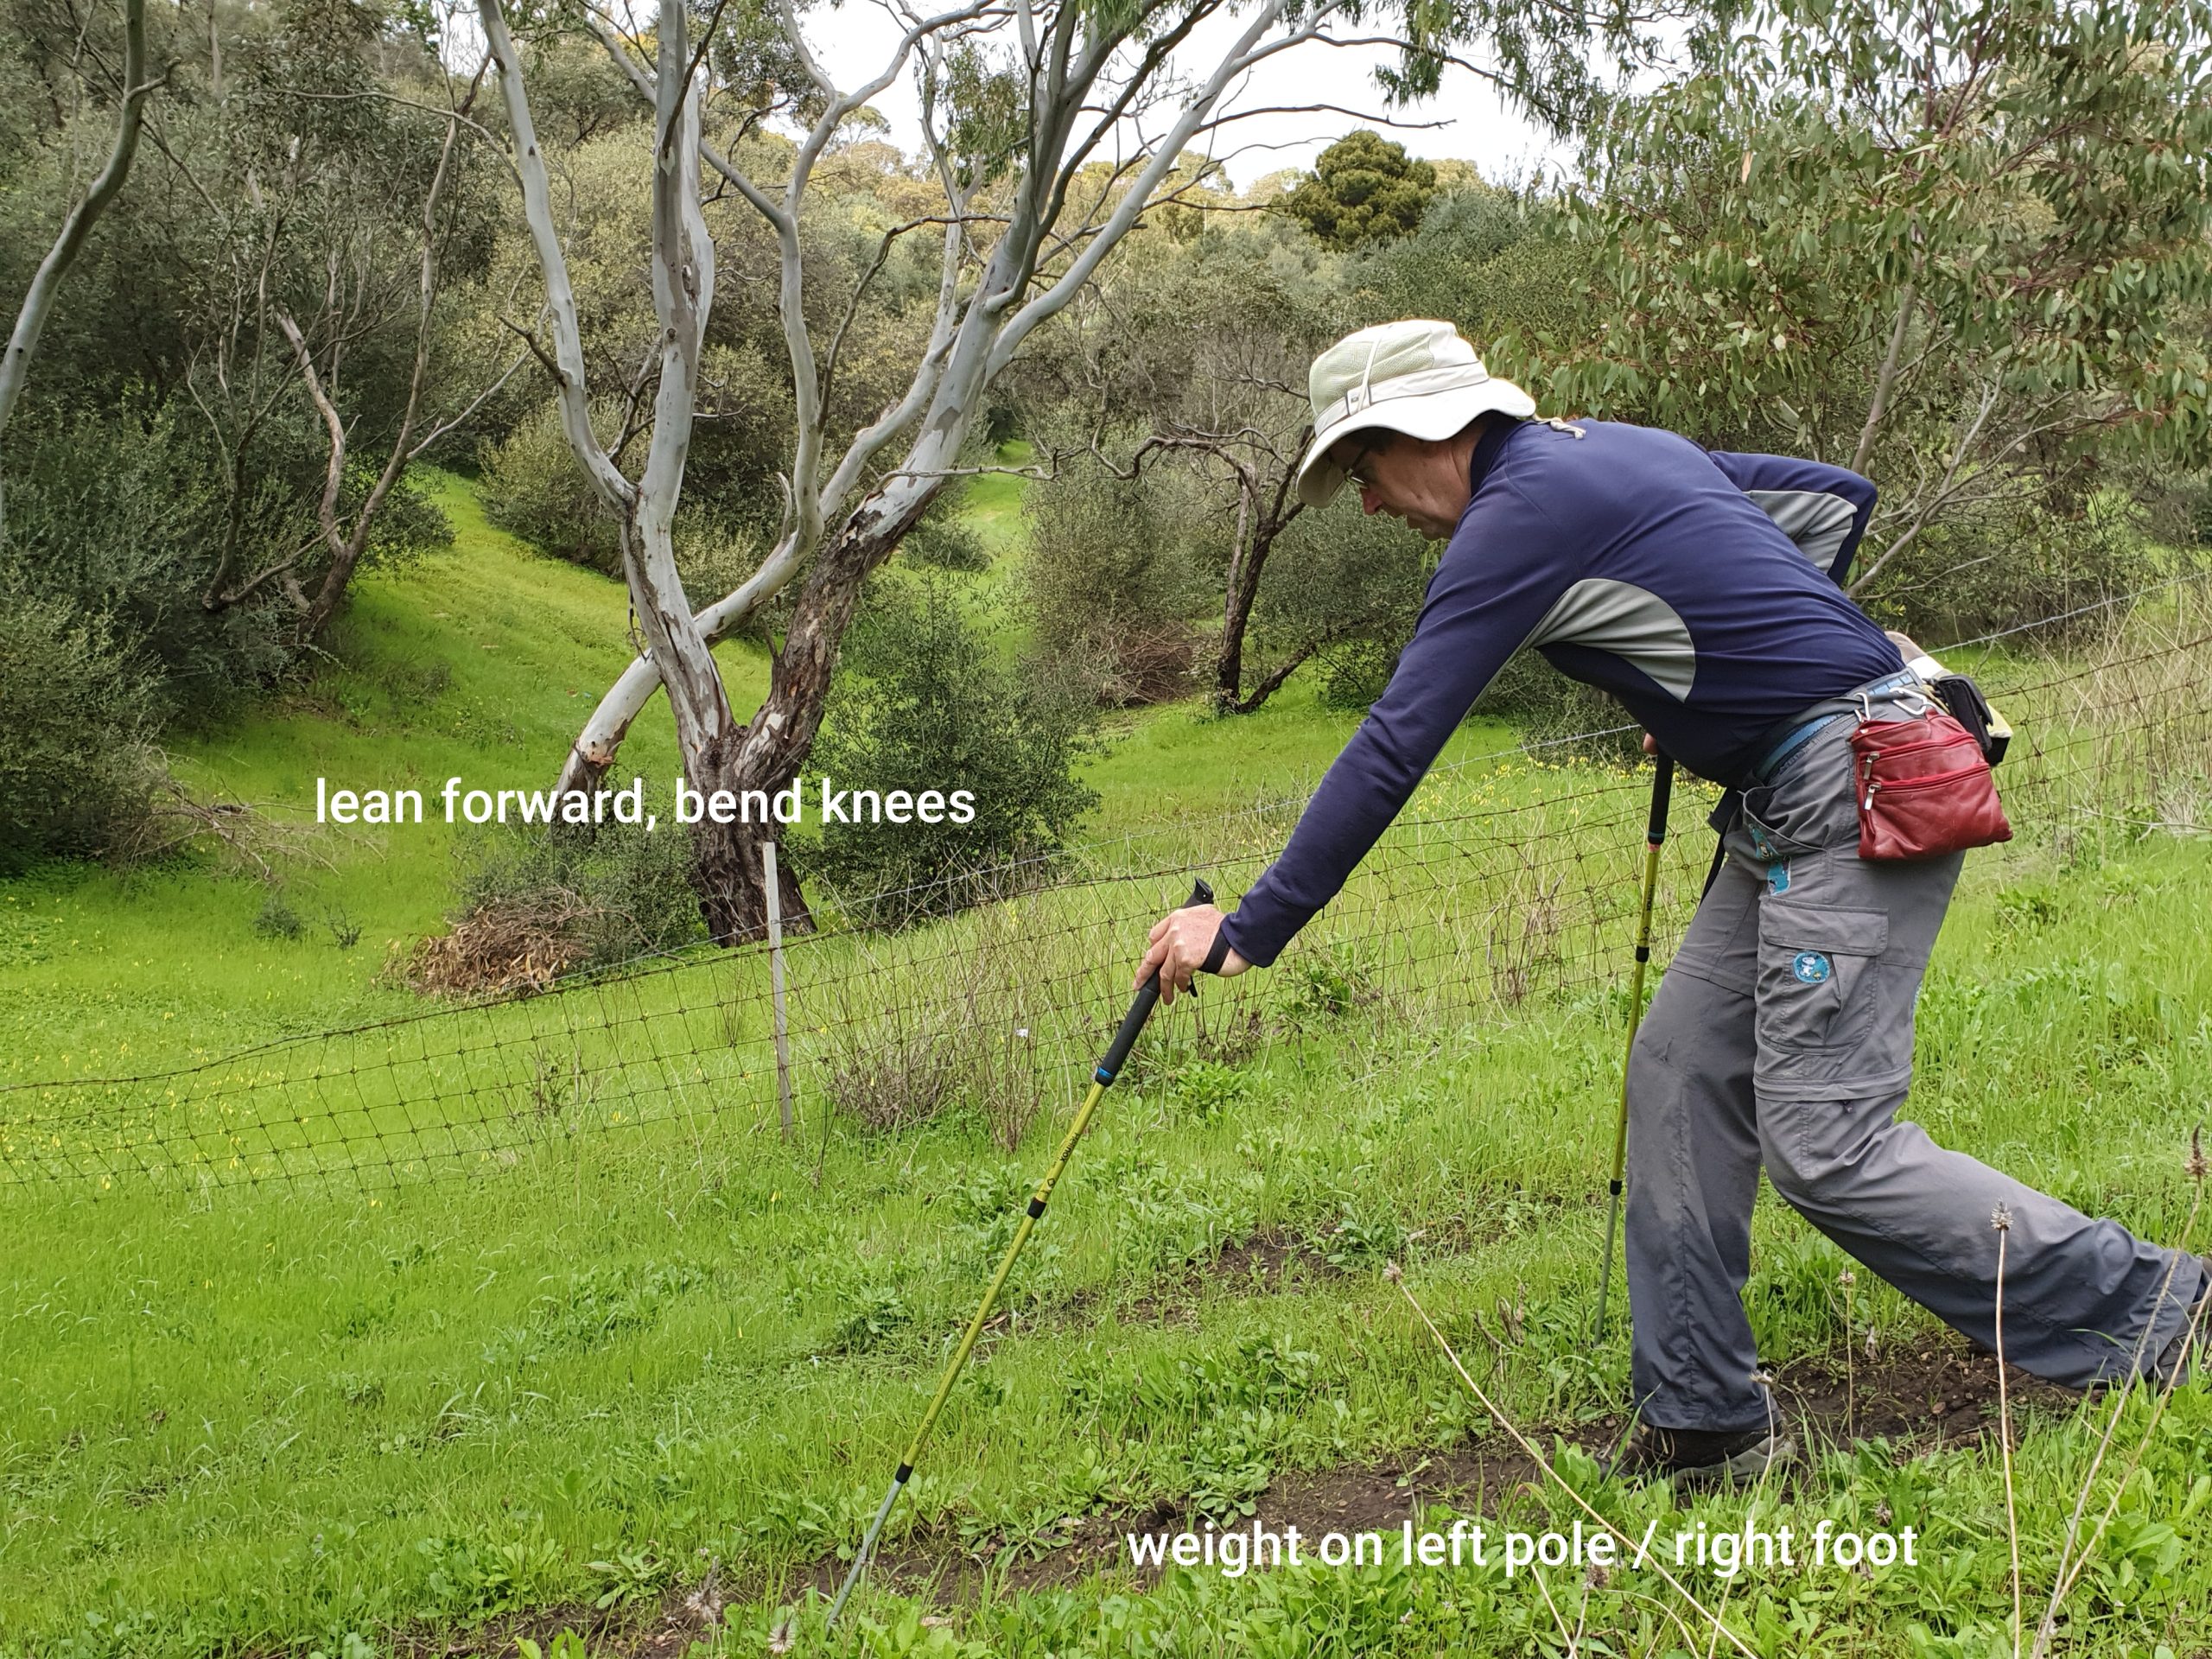
Downhill technique:
Used on any slope.
The safest descent (this is an example of do as I say, not as I do) also requires that you keep your poles in front of you. The steeper the descent the further in front, therefore you definitely need to lengthen your poles. Dig them in 60 – 90 cms in front of you. This is why I prefer tungsten tips to rubber stoppers. Leaning forward with bent knees, keep your centre of gravity just forward of your waist, making it very difficult for your feet to slip from under you. Again, use your poles with alternate feet to hands. You will always maintain at least two points of contact while all the time leaning forward. On very slippery ground you keep three points of contact and take very small steps, bending as low as you can go. If you go slowly, you will have three points of contact for much of the time. Moving smoothly down the slope avoids the temptation to stop, prop and lean backward, but requires smooth flicking to keep your poles in front of you. Best to start slowly even if the slope is not slippery (again do as I say rather than as I do).


Hopefully you will have years of fun downhills ahead of you. If you would rather watch than read, just ask.
See you on the Trail.